
Flush the DNS Cache on Mac, Having trouble loading websites in your browsers? One possible culprit is your DNS cache. You can clear this cache without damaging anything on your Mac, which could fix your website loading issues.
Depending on the version of macOS you’re using, you need to run a particular command in Terminal to get rid of the entire contents of your DNS cache. We’ll show you how to do exactly that on your Mac.
Knowing how to flush the DNS cache of Mac computers is not something that most users need on a day-to-day basis, but it is a skill that everyone should have. The DNS cache is usually a record of your browsing history, and emptying it can help troubleshoot problems while you’re browsing the web. When you can’t access a website and it’s not clear what the problem is, you may need to clear the DNS cache that Mac saves.
Here, we’ll show you how to flush DNS on Mac, the best DNS flushing apps and tools on Mac. OSX, and we’ll tell you which apps make it easy to flush your DNS cache and browse the web.
What is DNS caching?
We’ll explain how DNS flush Mac works in a second, but first let’s understand DNS a little better.DNS stands for Domain Name System. This is why visiting a web page a second time is faster than the first. Think of it like your Mac remembering directions to a website.
A DNS cache is your Mac’s entire memory of the location of websites on the web. Therefore, these numbers that your Mac has memorized help it quickly reach the final destination (a website). These numbers (something like 123,456,789,000) correspond to a domain where the site is hosted. When sites change domains, their number sequence can also change.
When you’re having trouble finding a website you’ve visited before, a clear DNS caching protocol for Mac can come in handy.
What does a DNS flush do?
The DNS server maintains a directory of websites and IP addresses, allowing you to look up the website address, find the corresponding IP address, and provide it to your web browser. This information is then stored on your Mac in a DNS cache.
When you try to access a recently visited website, your Mac uses its DNS cache instead of checking with a real DNS server. The web browser does not have to go through the extra step of contacting a remote DNS server, which reduces the time between entering a website address and loading the website.
If the local DNS cache is corrupted or out of date, it’s a bit like trying to use an old phone book or address book that someone has trashed. Your web browser checks the cache to find an IP address for the website you are trying to visit, and finds an incorrect or unusable address. This may slow down the process or prevent specific websites or website elements, such as videos, from loading.
When you flush your DNS cache, you’re telling your Mac to delete its local DNS records. This forces your web browser to check with a real DNS server the next time you try to access a website. You should always flush your DNS cache after changing DNS servers on your Mac. It can also be useful if you’re having connectivity issues.
Why should I flush the DNS cache on a Mac?
In general, you should flush your DNS cache when you encounter DNS-related errors on your Mac. This includes any DNS error messages you see in your browsers, as well as any apps you use on your Mac.
What is a DNS server and why is it not available?
Clearing the DNS cache fixes some browsing-related issues. This is due to how DNS works on your computer. If the DNS cache is corrupted or has other issues, this translation fails, resulting in broken browsing sessions. Flushing the DNS cache helps fix these issues on your Mac.
How to flush the DNS cache on a Mac
There are variations of this command, and you should use the correct one for your version of macOS.
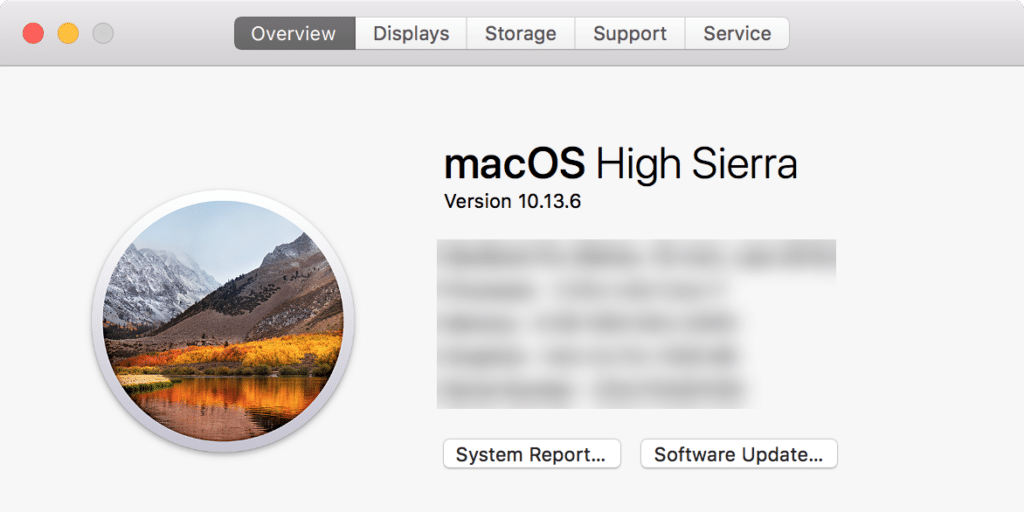
Step 1. Find your version on a Mac
The first thing you need to do is find your version of macOS. This will help you decide which command to use to flush the DNS cache. To check your version of macOS, click the Apple logo in the upper left corner of your screen and select About This Mac.
Step 2. Run a command to flush the DNS cache on Mac
You’ll use a Terminal window to run a command to flush the DNS cache on your Mac. Here’s how:
- Open Terminal by searching for it with Spotlight, Launchpad, or Finder.
- If your version of macOS is 10.11 or later, type the following command in Terminal and press Enter:
- If you’re using macOS version 10.10, use this command to flush the DNS cache:
- If you’re running macOS 10.5 or earlier, here’s the command to flush the DNS cache:
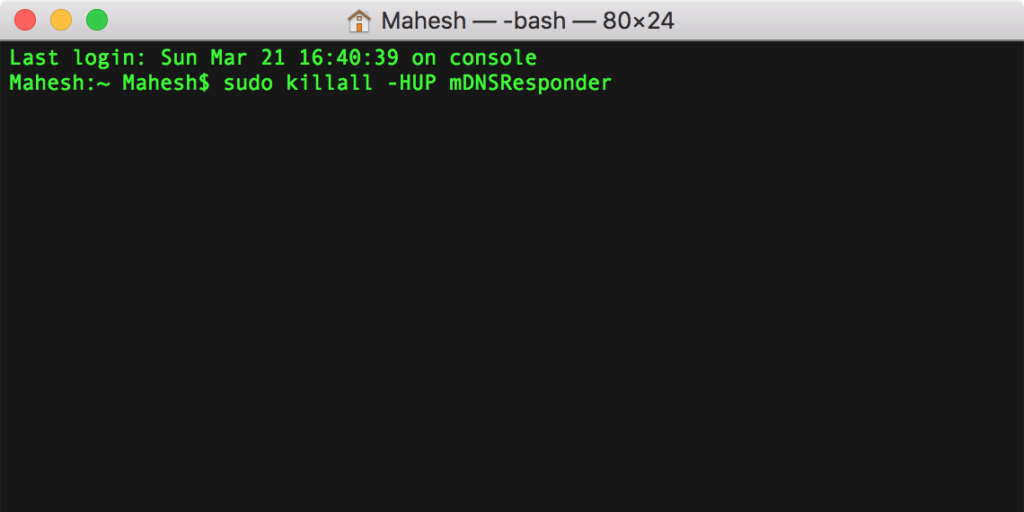
If you notice, every command has sudo at the beginning; this means that you will be prompted to enter your administrator password before you can run a command. Make sure you have your password handy before you try to run any of these commands on your Mac.
Why is Mac cleanup important?
Without routine maintenance, your digital life can become just as messy and confusing as the real world. Files get stored in weird folders, you download files multiple times thinking you forgot about them, and apps do weird things that can slow down your Mac. We’ll show you how to run some Mac cleaners to get your computer running smoothly again.
DNS cache causing problems
You will not experience any issues after removing these DNS cache files. What is DNS cache poisoning? How DNS Spoofing Can Hijack You The next time you try to connect to a site from your browser, your browser will retrieve new entries from the DNS server
Clear DNS cache to fix DNS issues on Mac
Flush the DNS cache on Mac does not harm your Mac in any way, so you should do it without hesitation whenever you encounter a DNS issue.
This can actually fix a lot of server-related domain name issues on your computer. Apart from DNS, you can also clear many other types of cache on your Mac. Clearing the cache is a quick and easy troubleshooting method for a large number of problems.
How to clean up Mac manually
One of the main reasons we see a slow Mac is that the storage is full. Your Mac has a lot of memory space, but it can fill up quickly if you don’t maintain it. When your Mac starts telling you that it’s running low on memory, it’s time to clean up the Mac computer.
The most troublesome files taking up space on your Mac are old or duplicate files. We often duplicate files to make changes, or download and forget old documents that we no longer want or need. There are also other areas that probably need your attention.
Clean up your Mac desktop
Start cleaning Macbook from the beginning: your desktop. First of all, it has Apple’s built-in Stacks feature that allows you to organize your randomly placed files and folders on your desktop in a structured grid and stack files of the same file type on top of each other in stacks.
Simply tap two fingers on your desktop and click Use batteries:
Then automatically sort files with Spotless. Drag and drop your files into the app and instantly create a filter for that file type. You can also create automated tasks to sort your files and folders and set a schedule and rules for organizing your files. This is a great solution if you want to set the rules once and enjoy a continuous automatic cleanup process forever.
If you’re more of a “here, now” type, you’ll love Unclutter. It’s like a temporary shelf to store notes and files on your desk. Although it stays hidden and doesn’t clutter your drive, you keep your desktop tidy at all times. Also, Unclutter can save the contents of your clipboard so you never lose what you copy.
FAQ
Can I check my DNS cache on a Mac?
In the latest versions of macOS, including Monterey, you can’t easily see your DNS cache because it’s set to private. In previous versions of macOS, the DNS cache could be viewed by doing the following. Open the Console app in Finder > Applications, select your Mac and type any:mdnsresponder in the search bar, hit enter.
When should I reset the DNS cache?
Resetting it helps you keep your cache up to date. You can reset your DNS cache from time to time to get rid of system errors, tampered with or outdated addresses, as well as to improve your Internet connectivity.
If you keep seeing a 404 error where it shouldn’t be, or if you’re having other problems accessing a website, a DNS cache reset can help resolve this issue. Periodic resetting can also be a privacy tool, as the DNS cache stores information about the websites you visit.
Another reason to reset your DNS cache is to protect against spoofing (when false information is entered into the cache and you may be redirected to a different website than the one you intended to visit).
Is it safe to flush the cache?
In most cases, yes, it is safe and your computer can easily create the cache from scratch when you visit new or previously opened websites.
conclusion
Clearing the DNS cache on Mac is not something you need to do often, but it is a good way to fix named server errors. Use the appropriate command for your operating system and you should be able to fix problems in seconds. If for some reason the command doesn’t work or you don’t feel comfortable using the terminal, CleanMyMac X will do the work for you..