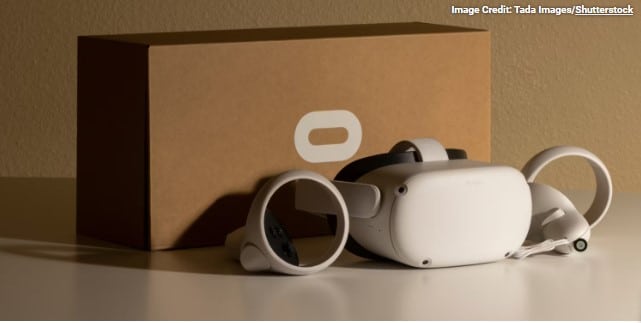
How to get and share Screenshots and Video clips on Oculus Quest
Here is the method to capture the Oculus Quest gameplay using screenshots and videos. Then you can share the captures with your friends and the whole world.
As lots of consoles have methods to capture the gameplay, you may need to do the same thing in your Oculus Quest. Fortunately, the Quest and Quest 2 have got methods to take the screenshots and the videos in the VR games that you play. So you have the chance to share them.
In the below part, we are going through some methods to share the things on your Oculus Quest with the others.
How can we Take Screenshots on an Oculus Quest?
There are some methods to have screenshots on the Oculus Quest game. This makes a 1024×1024 JPEG image. You can see the best methods in the below part.
If you are fond of taking screenshots without any of the controllers, there are some methods you have to learn on Hand tracking on the Quest.
How to Take a Screenshot Using the Button Shortcut
The simplest method to take a screenshot on the Quest is to use a built-in button combination. You have to press and hold the Oculus button which is on the right controller, and next press the trigger. Triggers are the things that your index fingers are on. You can press the trigger on any control while holding the oculus button.
If it is done correctly, it will make a sound and you will see a notification that you had the screenshot. Note that you should not hold the Oculus button for soo much time, if not you can change the view. You have to hit the trigger while seeing the Oculus logo circle making full ahead of you.
How to Take a Screenshot Using Voice Commands in Quest
The Quest has got a voice assistant, it is equal to Google Assistant or Siri. As it is only accessible in the US with the English language on the device. It is a very convenient method to open apps and many more things.
The Oculus voice assistant has the ability to support you by having the screenshots also. To collect that double-tap the Oculus button on your right side of the controller and say “Take a screenshot” when the window appears.
If the assistant is not appearing, you may have not set up the features yet, or the shortcut may have not been enabled. Press the Oculus button to get the menu and select the clock and other icons on the left side. So you can open the menu quickly. Select the Voice commands entry on the list and set it up if it is not there still. Or else try a voice command if they are all done.
To customize how the methods work, go to Settings > System > Voice Commands.
How to Capture Videos on the Oculus Quest
Do you need to display some of your skills in Beast Saber trackers or capture a good experience to send the friends who do not have a headset? The Quest headset has the ability to record video clips by the below-given methods.
By default, there is a red button on the screen to make us note that it is recording. If this is not needed, go to the quick menu as you saw earlier, go to Settings > Display, and disable the Video Capture Indicator.
Record From the Sharing Menu
The general method to record is using the option located in the key Quest menu. Press the Oculus button in the right controller and open the main menu. Select the Sharing panel with an arrow facing to the right. There is the Take Photo option and that is the least suitable method to have a screenshot that functions in a pinch.
At the same time, select Record video then the confirmation screen will appear. Enable the Include Mic Audio if you need the voice in the recording, if not there will be only the game audio.
Select start recording when you are ready and it will begin the recording. When it is ready to stop the recording, go to the sharing panel and select Recording.
Note that while you are gaming, the shortcuts to project, taking a screenshot. When it starts to record it will display on the game panel when pressing the Oculus button. This is very simple to operate.
Record Video Using Voice Commands
The Oculus Quest’s voice assistant has the ability to do video capturing also. Follow the given steps in the above section and activate the voice assistant you need.
Then you can ask for it any time and order to start the recording to start the re3cording. And again order as stop recording to end. To do this task without the controller check out the linked guide.
How to Share Oculus Quest Screenshots and Videos
After taking the screenshots and videos how do you get them out of your headset? It is because you have to show and share them with others. Fo that there are some options available for you.
Copy Your Quest Captures to a PC
The least suitable, and the most effortless method to share the Oculus Quest snaps is by connecting the headset to your computer. Link the Quest to the computer using a USB cable. Next put on the headset and there will be a reminder to get the permits for the connection.
After approving it, you can see the Quest appearing in the File Explorer of Finder in the list of the connected devices. Inside the Oculus folder, there will be folders called Screenshots and VideoSjots with some media files. By sorting to the date you can get the latest media.
After you have copied the files onto the computer, you have the possibility to upload those videos to YouTube. You can share the all images on your social media accounts and do anything you need.
Sync Your Captures Using the Oculus App
If you don’t need to connect the Quest to any computer for taking images, there is a feature to sync it with the Oculus app on your mobile phone.
If there is no Oculus app on your mobile phone. Get it for Android or iOS. There are some steps to sign in with the account and sync the headset. Referring to the Oculus Quest 2 setup guide you can get some support.
When your phone is ready, go to the Files app on the headset in the App list. This will be a collection of squares in the main menu.
There will be a Not Synced on all the media that have not been sent to the app. For automatically syncing, check whether the Cloud icon does not have a slash on the top right side. If it is you have to click it.
For manual Syncing, click the three-dot button on any file and choose Sync to add it to the app on your mobile phone for 14 days.
Next, you will find the media that is synced to the Oculus too on the Gallery tab. Select an image and click Share to copy it to the device or send it with any app on your phone.
Share Oculus Quest Captures to Facebook
The one and the only method to share the media directly from the headset to Facebook. If you need to share on Facebook, go to the file app. Click the three-dot button choose the item and share it. Then you can select where to send it on Facebook.
To share on other social media platforms, use the above-given methods and post the videos or images using a different device.
How to Cast Your Oculus Quest Gameplay
As everything is not the same as saving screenshots and videos, it is very important to get noticed about casting on the Quest. This lets the people watch when you play. If you need you can record the gameplay or have the screenshots with the linked device.
The Oculus Quest can be cast to the Oculus app with a smartphone or else of the PC browser as it is on the same network as your headset. For the casting, select the sharing tab in the main menu. Select Cast next Oculus app or the Computer.
If casting to the app, a notification will appear on your mobile phone when it is ready. To cast the to the browser, there will be some instructions to go to a URL and login with the Facebook account.
If you are in a group and need everyone to see the player, check the methods to cast the games from the PC to a Television to have the cast to the big screen.
Share Your Oculus Captures Everywhere
Using the given methods, it is very easy to capture and share the screenshots and also videos from Quest or the Quest 2 headset. It does not have e a high resolution but enough method to share the gameplay on Youtube or social media.
If you are someone new to Oculus, you have to confirm what you know on the Quest with the all tips.
Frequently asked Questions
How long does the oculus quest battery life last?
The Oculus Quest 2 is a great free-standing VR headset, but its battery life isn’t that much great. The battery life depends on what you’re doing. Generally, it can last for two or three hours of battery after a full charge.
What is air link oculus quest 2?
Officially Oculus Link was launched in late 2019. It was a wired solution to play PC VR games on Quest. Anyhow now you have permission to play PC VR content on the original Oculus Quest and Quest 2 wirelessly.
Recommendations